How to Get Razor-Sharp Cake Edges (Without Fondant) (2025)
- Bailey Smock
- Jun 5, 2025
- 4 min read

From the BeLuxe Bestselling Cake Recipe Series
Simple tips for clean lines, stable layers, and that pro-level finish.
We all want to reach that point where our cake edges are razor-sharp and we can finally say, "I made it."
It's like the unspoken bell at the top of the climb for bakers–proof that you've mastered structure, chill, and finesse.
The good news? You don't need fondant to get there. In this post, I'm breaking down exactly how to get razor-sharp cake edges using buttercream or ganache–plus the tools, chill times, and real-world tips that actually make a difference.


Start With a Solid Foundation
Use cake layers that are completely cooled...warm cake = slipping layers.
Personal Tip: Once my cakes come out of the oven, I let them cool for about 15–20 minutes—just until the pans are cool enough to touch but still slightly warm. Then I flip the pans directly onto plastic wrap and double-wrap the cake layers before placing them in the freezer.
The cakes can still be semi-warm at this point—the steam will lock in and create extra moisture. Just make sure you wrap them tightly so no air gets in.
Leave the cakes in the freezer for a couple of hours, then take them out and let them start to defrost—while still wrapped in plastic.
You want them cool enough that the crumb coat glides on cleanly without pulling any crumbs, but warm enough to trim the tops flat.
This step sets you up for those crisp, sharp top edges.


Level each layer. Uneven stacks lead to bulging or tilt.

Fill with a stable buttercream or ganache–soft fillings compromise structure.
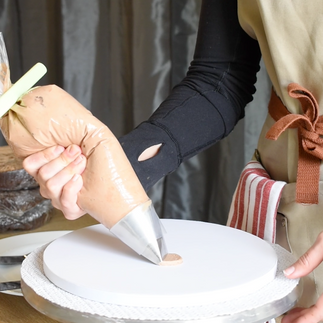
I’m using a buttercream filling in the photos below, with an added caramel drizzle.
If you’re adding anything more liquid (like caramel), make sure to add a dam: pipe a taller rim of frosting around the edge, fill the center with your softer filling, then cover the top with more stable frosting.
Avoid using the softer filling on the very top layer—it can compromise the structure of the cake.
Apply a simple syrup directly on top of the cake layers (before adding any frosting) for a sweeter, more moist cake.


Crumb Coat Tips for a Clean, Smooth Finish
Use a small offset spatula to apply frosting around the sides of the cake—it gives you more control around curves and seams.
Then follow with a bench scraper to smooth and even everything out.
For a cleaner finish, dip your scraper or spatula in hot water, then dry it with a paper towel before using. The heat helps glide the frosting smoothly without tearing it.
If you have a torch, you can gently warm your bench scraper that way—just be sure to wipe off any leftover frosting first to avoid burning it.
Once the sides are smooth, angle your heated scraper slightly to even out the top edge, pulling any excess inward for sharp, clean lines.
Chill between every step (filling, crumb coat, final coat).


Choose the Right Frosting for Sharp Edges
Buttercream:
Works well when chilled, but softens quickly in warm kitchens
Use American or Swiss meringue for best structure
Ganache (my go-to):
Firms up beautifully
Can be handled without smudging once set
Ideal for cakes that need to travel or stack tall

👉 Need a ganache recipe? [https://www.beluxebakingco.com/post/beluxebakingco-com-blog-white-chocolate-ganache-for-cakes]
The Tools That Actually Make a Difference
Bench Scraper – for consistent, clean sides
Short Bench Scraper [https://amzn.to/45bIyB4]
Tall Bench Scraper [https://amzn.to/4ktb3ij]
Offset spatula – for smoothing tight corners
Small & Medium [https://amzn.to/3Zke2kC]
Small, Medium & Large [https://amzn.to/3Fq5fqJ]
Turntable – essential for even pressure and control
Hot water + clean towel – to warm your scraper slightly, just once or twice if needed
Frosting + Finishing Technique
Chill cake fully before final coat
Apply a generous layer of buttercream or ganache
I am using ganache in the photos below. See full tutorial here: https://www.beluxebakingco.com/post/beluxebakingco-com-blog-white-chocolate-ganache-for-cakes


Hold scraper flat to the side and rotate turntable slowly

Leave a slight lip on the top edge–don't scrape it off yet

Once chilled, trim the lip clean with a paring knife

Run a clean finger lightly around the top edge to soften it (or leave it sharp)
Bonus Tip: Work With the Chill
Too soft = smears and dents
Too cold = frosting sets too fast
Test the surface with your finger before going in with tools
If needed, warm your scraper in hot water, dry it completely, then go in quickly
🤍 Final Thoughts
You don’t need fondant to get clean edges—you just need intention, the right chill, and a little patience. Practice makes perfect, but the tools and techniques above will get you a lot closer, a lot faster.
Got questions? Drop them in the comments or DM me on Instagram—I love helping other bakers nail this skill.


Baking Just Got Better:
I'm working on something special for bakers like you–a premium apron designed for comfort, durability, and style. Made from sustainable, ethically sourced fabric, this apron isn't just about looking good–it's about feeling good while you bake.
No more stiff, uncomfortable aprons–this one moves with you!
Crafted from high-quality, eco-friendly materials that last.
Thoughtfully designed for home bakers & professionals who care about sustainability.

*As an Amazon Associate I earn from qualifying purchases.


Comments